


Audio Extension
We thought it would be fun, and in some cases, pretty useful, if you could integrate sounds and music into your Ceros experience. Not only does this plugin let you do that, it also allows you to control the audio clips with play/pause buttons, toggles, loops, resets, mute and several different event triggers. You can also use this plugin to integrate a live stream right into your Ceros experience. Upload the demo experience to your studio to explore a finished audio piece, or follow the steps below to set up audio controls on your own.
How we did it
The first thing we did was to devise a naming convention for SDK Tags that would allow us to expose as much functionality from the Howler.js Web Audio library as possible. We then used the Ceros SDK to track integrations with objects whose tags followed the naming convention and to trigger the appropriate audio effects.
How to implement
1. Add the Custom HTML
In the Settings panel, paste the script below in the Custom HTML field:
2. Choosing a file type
We recommend using MP3 files for the best balance of small file size and high quality, however, you can use any of the following:
- MP3
- Ogg
- MP4
- Webm
3. Hosting sound files
In order for a sound file to be played, it must be hosted on an external server. It is not possible to add audio files directly to Ceros.
You can use this demo sound file if you would like something to test: https://creative-services.ceros.com/sampleaudio/ambient-background-corporate.mp3
In you have your own server that can host files (e.g. s3 or FTP), make sure that it has Cross Origin Requests (CORS) enabled and is publicly accessible, i.e., not behind a login – anyone should be able to access the file.
If your company has a website, that means there is a web server where your audio file could be hosted. You may need to reach out to your IT team to get this done if you are not able to upload to the server yourself.
4. Adding sounds to your experience
To add a sound file experience, you must attach the audio URL to the payload section of an icon, image, or text box in the Ceros Studio.
Steps to add an audio file:
- Find the objet you would like to attach the sound file to. We recommend placing a sound icon outside the canvas to make it easy to locate.
- With the object selected, open the SDK panel and, to the element you're adding the tag to, not the page, add the tag
playsound. This will be added in the 3rd field within the SDK panel.
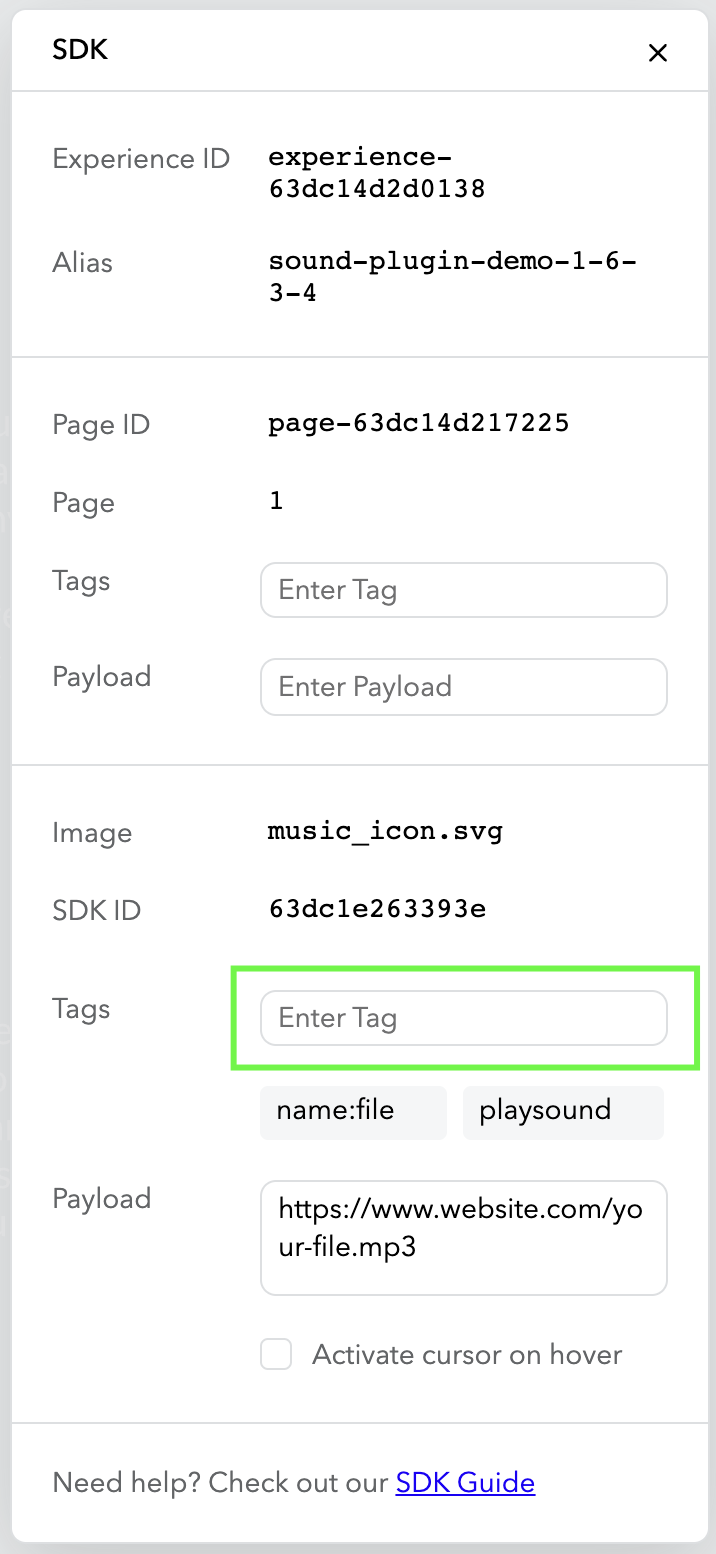
- Add an additional tag of
name:unique-nameand substitute “unique-name” with a name of your choosing. - Paste the URL to the sound file in the payload section - the last field in the panel. Ensure there are no extra spaces before or after the URL.
5. Adding click events to trigger a sound
Sound events are the drivers of the extension, and are what give users control over the sounds in an experience. In order for users to interact with your sounds, events must be added to a triggering object.
Steps to add a click event:
- Create or find the object you would like to add a click event to. We recommend using Hotspots to make it easier to locate in your layers panel.
- With the Hotspot or object selected, open the SDK panel and in the current selection section, add a
sound-clicktag. This tells the experience to listen for click events on this object. - Add an addition tag for the event you would like to fire when the Hotspot or object is clicked, such as
event:play. We’ve listed all of the possible events below. - Finally, identify the name of the sound file you would like to trigger using the
target:unique-nametag created in a previous step.
Notes:
- Dropbox will disable links that exceed 20GB worth of downloads per day. For experiences that are expected to receive traffic that exceeds 1,000 visitors per day, the sound files should be hosted on a CORS enabled server that won’t limit bandwidth.
- Since the hotspots created for the Audio SDK only trigger SDK commands, Click and/or Hover are NOT sent to Ceros analytics, Google Analytics, or Google Tag Manager.To work around this, there would need to be a Click and/or Hover interaction added to the hotspot. It can be anything, i.e., toggling visibility of a shape that exists off canvas.
Events:
TagDescription
event:loop | Plays the sound(s) and sets it to loop indefinitely. |
event:mute | Toggles the volume on a sound(s). |
event:play | Plays the sound(s). |
event:pause | Pauses the sound(s). |
event:reset | Resets and plays the sound(s). |
event:toggle | Plays the sound(s). Subsequent clicks will pause/play the sound(s). |
event:fastforward | Fast forwards the sound by 1 second, whether it’s playing or paused. Does not play/unpause sounds. |
event:rewind | Rewinds the sound by 1 second, whether it’s playing or paused. Does not play/unpause sounds. |
event:fadein | Fades the volume from 0 to the set volume (default: 2 second). |
event:fadeout | Fades the volume from the set volume to 0 (default: 1 second). |
Global events: all events can be applied globally to every sound in the experience. In order to do so, change the event in the event tag to eventall
6. Optional: adding streams to your experience
- Follow above steps for adding a typical audio file, making sure to add the URL of the source of the stream to the payload.
- Add the tag
stream:trueto the tags of the object. - Make sure an event is attached,
event:toggleis recommended for streams.
7. Sound settings
If you would like to really fine tune your sound and/or event settings, much can be done using tags alone. This section will tell you which settings you can change through tags and what those changes do.
WARNING: changing these may cause unexpected behavior.
Settings can be changed using the format: setting:value.
Setting ChangeDefault
start:3000 | Default = 0. To change the start time of your sound you may enter “start:your-start-time”, i.e. “start:2000”. The second part must be a number, and in milliseconds NOT seconds. |
fastforwardtime:3500 | Default = 1000 |
rewindtime:2000 | Default = 1000 |
volume:83 | Default = 100 |
rate:200 | Pauses the sound(s) |
event:reset | Default = 100 |